My Blog List

Thursday, April 29, 2021

Variations on canned tuna


My oldest daughter posed a question the other day: “Why do we talk about tuna fish salad? We don’t say salmon fish salad. Why not just tuna salad?” I have no answer, but I do know we eat a lot of it at our house, so much so that I order it by the case from a cannery. Christian and Jacob won’t eat it, Jordan only likes traditional tuna fish salad with lots of lemon and mayo. Me? I sometimes fix tuna casserole for one, or tuna Florentine (one of my all-time favorites), and I’ll even have creamed tuna on toast. But last weekend I played around with a recipe I found online, varying it enough to make it my own. It’s a sandwich billed as Italian Tuna Sandwich, primarily I suspect because it relies on salsa verde for its distinctive flavor.

The original recipe called for a baguette, but I often find them too crunchy—the crust gets between me and the filling. Jordan came home with what she called artisan bread—to me it was Italian or French bread, wider and softer than a baguette. I’m sure there’s a distinction between the two, but to me they are the same. And after one experiment slicing it horizontally for sandwiches, I hit on slicing it vertically, making two smallish slices. When I sliced in horizontally and asked my dinner guest how big a sandwich she wanted, she indicated such a skinny amount it was hard to put the filling on the bread and the whole thing ended up being a knife-and-fork meal.

So here’s what I did. Note that I am calling it a tuna sandwich, not tuna fish!

An Alternative tuna sandwich (serves two)

Four slices Italian/French bread (You’ll have lots left over to freeze for another day.)

1 7-8 oz. can good tuna (I used water-packed because that’s what I had and the salsa verde has enough oil in it.)

2 Hard-boiled eggs, sliced

Watercress (if you can find it; if not some strong green with flavor, maybe even mustard greens or romaine)

Salt and pepper

A basic salsa verde

4 anchovy filets (it’s sometimes hard to separate them, so use most but not all of a tiny can, depending on how strong you want the flavor)

1 cup, more or less, of chopped Italian parsley

1 tsp. dried basil—if you have fresh, try ½ cup

2 cloves garlic

1 Tbsp. capers, drained

½ cup olive oil

1 Tbsp. lemon juice

Blend all ingredients well in food processor.

Assembling the sandwich

Use a fork to chunk the tuna—you don’t want big chunks but neither do you want flakes. Spread one side each of two slices of bread generously with salsa verde. Top with chopped greens, then the tuna, and then the egg slices. Salt and pepper the eggs, and top with second slice of bread. Enjoy!

Here’s another recipe I found and tried. I wasn’t crazy about it, but I might try it again, adding more spice or perhaps using lemon instead of balsamic. If you try, let me know, please.

Italian tuna and white bean salad

1 15-oz. can cannellini beans

1 8-oz. can corn (3/4 cup)

1 7-oz. can water-packed albacore tuna

¼ cup chopped onion

Dress with equal parts of olive oil and balsamic vinegar. Salt and pepper to taste. Chill before serving.


Thursday, April 22, 2021

Chicken/pesto pasta


Try saying that three times fast! Last night I had a Zoom meeting at six o’clock, so Jordan was cooking dinner. We had planned ahead that supper would be chicken and pesto with pasta. Jordan thought she’d just do it off the top of her head, but it struck me that it might be better to have a recipe as a guide. One of those cases where the internet is a blessing of modern living. I googled and found an easy, quick recipe—but, of course, it required some fiddling, and Jordan altered it a bit.

The quarantine mentality lingers around here, and my tiny pantry is overstocked with some things, pasta being one of them. This is a real problem, because my basic pantry is one deep drawer, and pasta takes up a lot of space. I have for instance a partial package of spinach noodles which has been batted about and squished so much that the noodles are broken into tiny pieces. I want to just pitch them, but Jordan loves the spinach noodle dish we do so they continue to occupy real estate in my pantry. Tonight, the question was what pasta? The recipe called for penne, but with the plenty we had on hand I wasn’t about to buy more. Jordan suggested egg noodles—we always keep those because they’re good in casseroles and Jacob loves them buttered. But we decided on the pound of elbow macaroni I’d bought for a pasta salad that never got made. The recipe called for the whole pound, but that was part of her adjustment.

Another quantity problem we have is with rotisserie chicken—you can never tell how much meat you’ll get. It averages about two cups, sometimes less, sometimes more. I did read an article recently about all the sugar, salt, and other additives in these prepared chickens. The take-away? Read the ingredients label carefully. Whole Foods got the best recommendation. I’m going to look carefully the next time we buy a chicken at Central Market. Of course, much of that seasoning is on the skin, so if you discard that before using the meat, you’re taking a big step toward healthy eating. And by the by, I hope you know to skin and debone those chickens right when you get them home, while they’re still warm. It’s twice the chore if you let them get cold.

Here’s what Jordan did:

Chicken Pesto Pasta

½ lb. small elbow macaroni

1.5 lbs. chicken, diced (from a rotisserie chicken)

¾ tsp. salt

¼ tsp. pepper

2 Tbsp. olive oil

1 Tbsp. butter

1-1/2 c. heavy cream

¼ c. chicken broth

1/3 c. pesto – (we decided the dish could have used more)

¼ c. grated Parmesan

Extra Parmesan for topping

           Cook pasta, drain, rinse, and set aside.

Sprinkle chicken pieces with salt and pepper. Heat butter and olive oil in a large pot and sear the chicken until golden brown.

Add heavy cream, pesto, ¼ c. Parmesan, and broth—and simmer until it reduces a bit.

Add the pasta, a bit at a time. This is an important point—you want the dish to stay creamy, so add pasta gradually, making sure it doesn’t absorb all the sauce. When it gets the consistency—or pasta/sauce balance—you want, quit, even if you have leftover pasta.

Serve immediately, topped with more Parmesan and ribbons of fresh basil if you have it. Serves four.

Buon appetite!

Thursday, April 15, 2021

Chicken/cream cheese crescent roll-ring


This is not the same recipe (the herbs on top might be good though)
Picture is to show what finished ring looks like.


Crescent-roll rings are all the rage these days, yet another advance in convenience cooking. You’d think I’d scorn them, since as much as possible I’m a do-it-yourself person. But it’s hard to duplicate crescent rolls at home—even if you’re smart enough to make your own croissants, they aren’t the same. And those tube rolls do taste good.

We’ve had success with taco crescent rings (Christian said it was like being in high school again, but the resident teen-ager loved it—all the ingredients you’d put in a hamburger taco put, instead, into a taco ring) and a pesto ring—if I remember correctly, it had a lot of cream cheese and maybe some chicken. It is pictured above.

So the other night I dragged out the recipe for some chicken roll-ups I’d made long ago and really liked. The directions on my old copy of the recipe say, “Spoon into crescents. Roll them up, making sue they are sealed around the chicken mixture.” Not very specific, and I think I always came out with more filling than space in the rolls (that’s my problem a lot—did it the other night when I made tuna pasties too).

Jordan and I struck a bargain, I think because I had a dinner-hour Zoom meeting to attend. I would get the filling ready if she would make the rolls. To my surprise, she said she didn’t know any other way to do it than to make a ring. So here’s what we did:

Filling:

1 8-oz. pkg. cream cheese, softened to room temperature.

2 chicken breasts, cooked and meat shredded (Rotisserie chicken will work fine, but I recently read a warning about excessive salt and sugar injected into these chickens to keep them moist)

1-1/2 c. grated sharp cheddar cheese.

1 c. grated Monterey Jack

¼ tsp. salt

¼ tsp. pepper

Combine ingredients, blending thoroughly.


Assembly

1 pkg. crescent rolls

Bread crumbs

¼ stick butter, melted.

this is an apple ring, but it shows the
basic layout of arranging the crescent rolls

Separate rolls and lay out on a large cookie sheet with pointed ends extending out from center; at the center, bottoms of the triangles should be touching. Carefully spoon filling onto the ring near the base of the triangles. Don’t let the filling spill over so that it will end up in the hole in the center of the ring.

Gently fold each pointed end over the filling. Brush with melted butter and sprinkle with breadcrumbs or panko. Bake ring at 350 for 20-25 minutes or until top is nicely browned.

Leftovers will freeze and can be reheated at 325 for 15 minutes after thawing.


Thursday, April 8, 2021

Tater Tot Casserole revisited


Easter Tater Tot casserole

—or what happens 
when you let the kids cook Easter breakfast

Easter is always a scheduling problem for us. We want a “festive” breakfast, probably a hangover from the days of hunting eggs the minutes young eyes opened. Then we have to decide which church service to attend—in my youth, there was only one and no choice; this year our church offered six services, some indoors, some outdoors, some more casual, others formal. And then my family is off to visit Christian’s family.

This year, the schedule changed…and changed again. But one thing remained: Christian was interested in Tater Tot casseroles, and I had found a promising recipe from a BBQ joint. Of course, because it was a commercial recipe it would feed Coxie’s Army. We would halve it. Jordan and Christian decided they would make it, we would “break fast” at ten-thirty, in time to be ready for the eleven o’clock virtual service. Recipe in hand, they disappeared into the house.

It wasn’t five minutes before Christian called. “What holds this together? There’s nothing to bind it. It’s going to be a pile of mush.” I said, “Eggs,” and he retorted, “Well, it doesn’t say that. How many?” I pulled the number six out of the air. He eventually used eight, which made two for each of the four of us. They made other substitutions, like pork sausage for bacon, which I found odd because the two, while both breakfast meats, are nothing alike in texture or taste. And six cups of grated cheese? No way. So here’s what they did:

Tater Tot Breakfast Casserole

8 eggs, beaten.

1 stick butter

1 can cream of mushroom soup.

3 cups shredded cheddar cheese, divided

2-1/2 tsp. Cajun seasoning (we had some new they had just brought from New Orleans)

2 cups sour cream

1 can Rotel tomatoes, drained

1 cup white onion, diced.

1 lb. pork sausage, cooked, drained, and crumbled

1 bag frozen Tater Tots

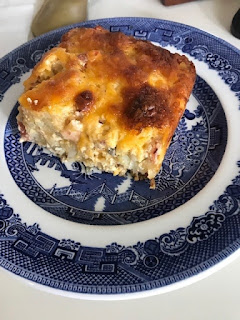
Cook the pork sausage. Defrost Tater Tots and mix with 2 cups cheddar cheese and all other ingredients. (The taters ended mixed with everything else and were more like small hash browns rather than holding their original shape, but that was okay.) Pour into casserole dish and bake 30 minutes at 350. Sprinkle remaining cup of cheese over top and bake another 15 minutes, until cheese melts and begins to brown.

Let it sit and firm up for five or ten minutes before cutting. You really don’t need anything else with this—it’s got meat, potatoes, dairy, it’s hearty and filling, and it’s delicious. And it’s generous enough you could still invite half of Coxie’s Army.

There was some insider joking as we ate. When I praised the dish, Christian said, “If you want me to make it for you again, I’ll be glad to” and laughed out loud, while Jordan threw him baleful looks. It seems they were quarreling over who did what and who could really take the credit. Me? I kind of enjoyed having them cook and serve it.

Next on the breakfast menu? Matzoh brie—like migas but made with matzoh instead of tortillas. Christian is interested.

Thursday, April 1, 2021

Ham roll-ups, really? How about pork tenderloin?


Since I'm so intrigued by vintage recipes these days--and appalled that what I cooked for my children is now vintage--I decided it's time to give a shout-out to my first cookbook. The kids each contributed memories and favorite dishes to this one, and there are pictures of each grandchild. Of course now they're all over ten years older. And, yes, that's Jacob on the cover--his pre-school dressed him in that outfit and it was too perfect not to use on the book's cover. As you can imagine, it sparked a lot of complaints among the parents of the other grandkids.

In line with my vintage interests, one member of a mystery writers’ group I belong to is starting a new series set in a vintage cookbook shop in New Orleans. Her announcement of this sparked a lot of emails about vintage recipes and images of cookbook covers. One image several people sent was a cookbook titled Cooking for Two, apparently part of a series. Don’t bother looking on Amazon, because there are literally dozens of books with that title—and I didn’t find the picture I was looking for.

The image in the emails was of ham roll-ups. Remember them? No, not the ubiquitous appetizer suggestions we have today, but the main dish, usually ham wrapped around broccoli (or maybe asparagus) and topped with a cheese sauce that was suspiciously yellow. Yep, Velveeta. The sauce alone occasioned many comments, mostly derogatory about Velveeta. I jumped in with my opinion that there are a few recipes where nothing but processed American cheese will do, and I was gratified that the author of the forthcoming series agreed with me.

But ham roll-ups is not one of them. In fact, the whole idea of roll-ups, served perhaps like crepes, is not appealing, unless you grew up eating them and the memory takes you back to your mom’s table. Even then, I think Hollandaise would be better than the cheese. To top it off, a half of a canned peach sat next to the roll-ups, with a Maraschino cherry carefully placed in it. Ah, the food of the Sixties!

Of course, part of the appeal of food from that era was the convenience. Housewives were just learning they did not have to spend their entire day in the kitchen. Some days I don’t want to either. Sometimes I want something quick and simple, and the other day I fond it in a crockpot recipe (thanks, but no Instant Pot or air fryer for me!). Crockpots are old-fashioned but reliable. Also, with this recipe, I accidentally demonstrated that a crockpot could overcome the problem of an unreliable cook. Here’s what I did:

Slow cooked pork tenderloin

About two lbs. pork tenderloin (we are at that breaking point where one is not enough and two is too much; I’d always rather have leftovers)

¼ cup white balsamic vinegar

½ cup dark brown sugar

2 Tbsp. low sodium soy sauce

1 Tbsp. corn- or potato starch

½ cup water

1 tsp. salt

½ tsp. fine ground pepper

           Put the meat in the crockpot, mix the remaining ingredients, stirring until sugar and starch are well blended into liquid, and pour over the pork. Cook on low for 6-7 hours or high for 3-5 hours.

I really need to learn to read directions more carefully. I thought it said cook on high for 6-7 and then low for 3-5, which I thought was an awful lot of cooking for a tenderloin. Nevertheless, I persisted—and realized my mistake about three hours in. So I turned it to low and let it cook the rest of the day. The meat was a little dry, but generous use of the sauce compensated for that—and the flavor was wonderful. We served it over Asian noodles.

Terrific leftovers the next day: sandwiches on rye bread with generous dollops of mayonnaise and a crisp leaf of lettuce or two. The meat shredded easily, making it perfect for sandwiches. I’ll definitely do this again and just cook it most of the day on low.

You can’t win all the time in the kitchen, but this was an instance where my carelessness—or haste—worked out just fine. I do recommend careful reading of instructions, however.